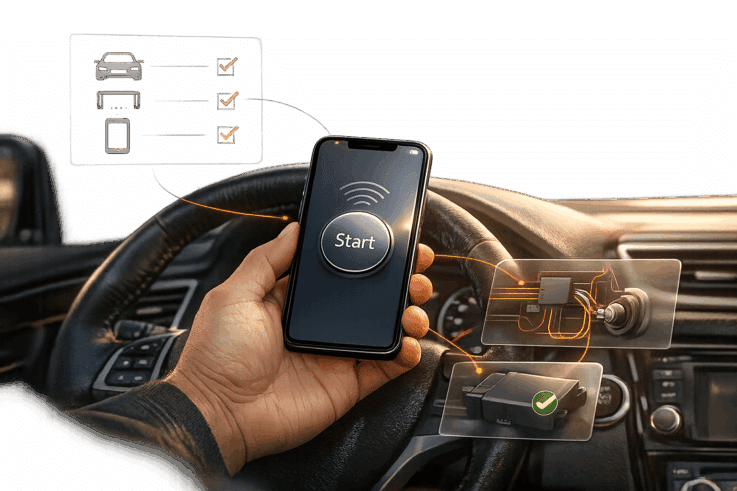
An app-based remote start system lets you control your car – start the engine, lock/unlock doors, and monitor its status – all through your smartphone. These systems are convenient for pre-heating or cooling your vehicle, offer features like GPS tracking and battery monitoring, and can be operated from almost anywhere with a signal. Installation typically takes 2–4 hours, costs $200–$500 (plus parts), and may require a subscription. Here’s what you need to know:
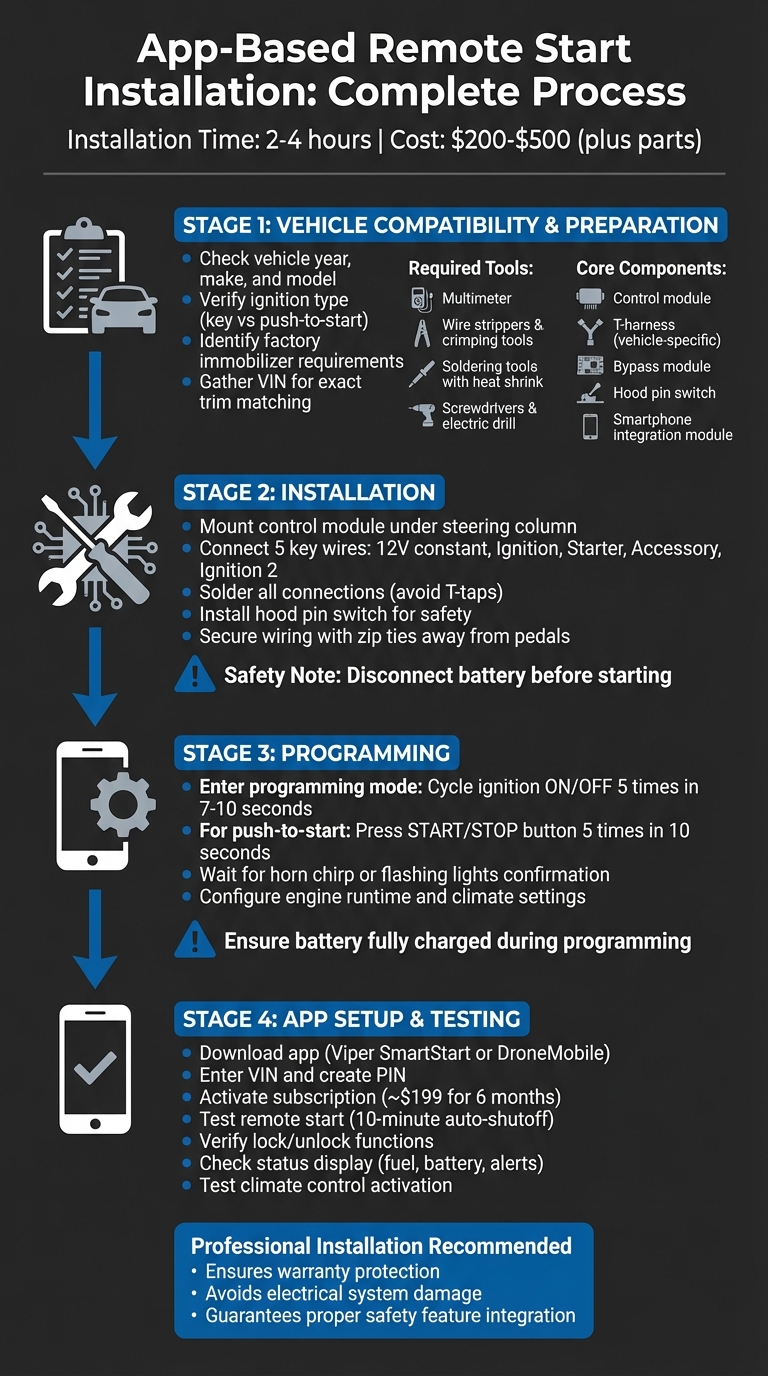
Compatibility: Confirm your vehicle’s year, make, and model. Check for factory immobilizers and whether a bypass module or specialized harness is required.
Tools Needed: Multimeter, wire strippers, soldering tools, and vehicle-specific components like a control module and T-harness.
Installation Steps: Mount the control module securely, wire connections carefully, and program the system for proper function.
App Setup: Download the app, pair it with your car, and test features like remote start, lock/unlock, and climate control.
Professional installation is recommended for reliability and to avoid warranty risks, but detailed DIY instructions are available for those comfortable with vehicle electronics.
App-Based Remote Start Installation Process: 4 Major Steps
Vehicle Compatibility and Preparation
Check Vehicle Compatibility
Before diving into any installation, it’s crucial to confirm your vehicle’s compatibility. Using an online vehicle selector tool, you can input your car’s year, make, and model to identify the specific harnesses and modules you’ll need. Factors like your ignition type (standard key or push-to-start) and transmission type play a big role in determining the required hardware. For example, manual transmissions, certain hybrid models, and vehicles with advanced factory security systems often demand specialized equipment.
Most modern vehicles come equipped with a factory immobilizer, which means you’ll need a bypass module to ensure the remote start system functions properly. Vehicle-specific harnesses simplify the process by allowing programmable modules to integrate without requiring a complete rewiring of your car.
To make this process smoother, keep your Vehicle Identification Number (VIN) handy. This helps ensure the system matches your car’s exact trim level and factory features. Some newer models, like 2019+ Audi vehicles, may already support app-based start systems through factory services. However, older vehicles often require aftermarket kits from brands such as Compustar or Fortin.
Once you’ve confirmed compatibility, it’s time to gather the tools and components you’ll need for the installation.
Required Tools and Components
Having the right tools and components is key to a smooth installation. Here’s what you’ll need:
Essential tools: A multimeter, wire strippers, crimping tools, screwdrivers, an electric drill, pliers, and a reliable light source (such as a headlamp).
Connection materials: Soldering tools with heat shrink sleeving for secure connections, plus electrical tape and zip ties to protect and organize wiring.
Core system components: These typically include a control module, a vehicle-specific T-harness, a bypass module, a hood pin switch, and a smartphone integration module (like the Drone X2).
Programming tools: A computer and USB cable to flash the module with vehicle-specific firmware. Keep in mind the additional costs for programming cables and control modules when planning your budget.
For trusted components and advice, Auto Sound & Security offers remote start kits from brands like Viper and Compustar. Their technicians can guide you in selecting the right T-harness and bypass module for your specific vehicle needs.
With your tools and components in place, it’s essential to prioritize safety before starting the installation.
Safety Precautions
Safety should always come first when working on your vehicle. Start by disconnecting the car battery to avoid short circuits or accidental damage to your car’s electronic systems.
If you’re working under the steering column or dashboard, take extra care to identify and steer clear of airbag modules – they’re sensitive and require precise handling. Another critical safety element is the hood pin switch. This device prevents the engine from starting remotely while the hood is open, protecting you from unexpected accidents while working under the hood.
When installing the module, choose a dry, cool location away from moving parts – common spots include under the steering column or behind the kick panel. Use zip ties to secure all wiring, ensuring it doesn’t interfere with pedals or other components. Also, tape off any unused wires from the harness to prevent electrical shorts.
sbb-itb-74b4b25
Step-by-Step Installation Process
Mounting the Control Module
The control module is usually installed under the steering column, close to the fusebox and ignition wiring harness. To make the process easier, adjust the driver’s seat and open the door to create enough workspace. You’ll need to remove some plastic trim panels, like the knee bolster or steering wheel cover, to access the wiring.
"The control box… usually goes under the steering column, near the fusebox and ignition wiring harness." – Nigel H, CarAudioNow
Since control modules are compact, they can be attached to the wiring harness or secured to metal brackets. Make sure the programming button and LED indicator lights are easy to access during setup. Keep the module and its wiring clear of the brake pedal assembly and steering shaft to avoid any interference. A headlamp can help you clearly see the mounting points and wiring harnesses.
If your system includes a separate shock sensor, attach it to a sturdy surface like the kick panel for accurate vibration detection. For external parts, such as sirens, mount them under the hood with the speaker facing downward to keep water out.
Once the control module is securely in place, you can move on to wiring.
Wiring and Integration
The main connections you’ll need to set up include the 12V constant (always powered), the Ignition wire (active when the engine runs), and the Starter wire (only live during cranking). You’ll also connect to the Accessory wire for powering items like the radio or climate control, and Ignition 2 if your vehicle has a secondary circuit.
Always verify each wire’s function with a digital multimeter – don’t rely solely on wire color charts. The brake wire connection is crucial to prevent remote starting while the car is in gear or to shut off the engine if the brake is pressed without the key. A solid ground connection to the vehicle’s metal body is also essential for stable electrical performance.
"Soldering is the best method because the last thing you want is a bad join. That will probably leave you unable to start your vehicle." – Nigel H, Car Audio Expert
For systems with smartphone control, connect the app-specific module or harness to the main controller, which integrates into the ignition wiring. Use a soldering iron and heat shrink tubing for all connections. Avoid loose methods like T-taps, as they can lead to unreliable starts. Keep all new wiring away from heat sources and moving parts, and secure everything with cable ties to prevent rattling or wear.
Programming the Module
Once the wiring is complete, the module needs to be programmed to function correctly.
Programming involves syncing the control module with your smartphone interface or other devices. Enter programming mode by cycling the ignition from OFF to ON five times within 7–10 seconds. A horn chirp or flashing parking lights usually confirm successful entry.
For vehicles with push-to-start systems, press the START/STOP button five times within ten seconds instead of using a key. Make sure the car is in Park (for automatic transmissions) or Neutral with the parking brake on (for manuals). Ensure the vehicle battery is fully charged to avoid errors during the programming process. Rapidly cycle the ignition or press the START/STOP button to initiate the sequence.
If your system includes smartphone integration, additional settings like engine runtime and climate control thresholds may need to be configured. Have all physical key fobs and the smartphone app ready before starting, as the programming process often clears previous pairings from the module’s memory.
Configuring and Testing the Smartphone App
Downloading and Pairing the App
Start by downloading the required app, such as Viper SmartStart or DroneMobile, from either the App Store or Google Play. Once installed, follow the app’s step-by-step pairing instructions. You’ll need to enter your vehicle’s VIN and create a unique PIN. If your smartphone supports it, enable biometric authentication for added security. Also, make sure any necessary cellular service or connected-car subscription is active – some services cost around $199 for six months.
To pair the app with your vehicle, activate the system’s learning mode. This typically involves cycling the ignition on and off five times within 7–10 seconds or using the Valet switch. When the system signals it’s ready (via a chirp or flashing lights), press the pairing button in the app. Ensure the vehicle is in Park with the parking brake engaged during this process.
Once the pairing is complete, it’s time to test the features to ensure everything works smoothly.
Testing System Features
With the app successfully paired, test each feature to confirm proper functionality. Start by remotely starting the engine and check for the notification confirming the action. The engine should run for roughly 10 minutes before automatically shutting off. For safety, test that the engine stops immediately if the brake is pressed without the key present or if the hood is opened.
Next, test the lock and unlock features. Confirm that the app accurately displays the vehicle’s status, including details like fuel level, battery voltage, and security alerts. Also, check that climate control activates correctly through the app. If the remote start button disappears or commands fail to execute, try logging out of the app and back in, or re-pair your phone with the system. Make sure the app functions seamlessly on both cellular and Wi-Fi networks.
Keep in mind that some factory-installed systems may impose limits, such as allowing only two consecutive remote starts before requiring a manual key start.
Troubleshooting Common Issues
Troubleshoot Connectivity Problems
If the app isn’t connecting, start by checking and repositioning the antenna. Keep it away from electronic devices or radio towers that could cause interference. Also, make sure the vehicle battery is charged above 12.4 volts. A low battery can lead to module resets during high-amperage crank cycles.
Another potential issue is Valet Mode, which completely disables remote starting. You can identify this mode by a specific parking light flash sequence – typically 3 flashes, a pause, followed by 10 flashes. To exit Valet Mode, turn the ignition to ON and press the brake pedal 10 times within 10 seconds. Additionally, check if the Check Engine Light is on. Even something as minor as a loose gas cap triggering an EVAP code can block the remote start feature.
If connectivity issues seem resolved but operational problems remain, move on to inspecting wiring errors in the next section.
Fix Installation Errors
After confirming that the module is installed and wired correctly, these steps can help address common errors.
Wiring issues are a frequent cause of problems. A solid red LED on the control module often indicates the system has locked up due to harnesses being connected in the wrong order.
"The number one cause of solid red LED lockups is connecting harnesses in the wrong order" – Eric Williams, Automotive Engineer
To avoid this, always connect the black 4-pin power/ground connector first, then the ignition relay harness, and finally the door lock harness.
If the engine cranks but doesn’t start, the tachometer signal may need to be re-learned. Make sure the tachometer wire is properly connected. Start the engine with your physical key, hold the brake pedal, and press the remote start button for 10 seconds. Another common issue is a malfunctioning hood switch. Check the hood latch for corrosion or road salt buildup, as the system won’t start if it falsely detects the hood as open.
For modules that don’t respond at all, unplug all connectors. Press and hold the programming button while reconnecting the power until the LEDs cycle. If the problem persists, the factory ground may be too weak. Run a dedicated 10–12 gauge ground wire from the module to a clean, paint-free spot on the chassis.
Best Method to Add Remote Start | DIY Detailed Install | N2 Designs 2010-2019 OEM Key and Phone App
Conclusion
An app-based remote start system transforms the way you interact with your vehicle. It allows you to remotely pre-condition the cabin, protect your engine with proper warm-up cycles, and adds an extra layer of security with automatic shutdown in case of unauthorized access. Best of all, it works from virtually anywhere as long as there’s cellular coverage.
Installing these systems, however, is no simple task. It requires careful attention to detail and precise timing to ensure every component and safety feature is correctly integrated.
Picking the right installer is just as important as choosing the system itself:
"The installer you choose is just as important as the system itself. A remote starter involves wiring into your vehicle’s electrical system, and poor installation can cause problems with safety, reliability, or even your warranty." – Pro Car Sound & Security
For the best results, professional installation is the way to go. Auto Sound & Security specializes in installing premium brands like Compustar and Viper. Their experienced technicians handle the complexities of integrating push-to-start systems, factory immobilizers, and advanced electronics – tasks that can be daunting for a DIYer. They use tools like multimeters to verify connections, test critical safety features like hood pin switches, and ensure your remote start system works flawlessly.
Whether you go the DIY route or opt for professional help, using quality components and following proper procedures ensures years of reliable remote starting and hassle-free convenience.
FAQs
Will remote start work with my push-to-start and factory immobilizer?
Yes, many remote start systems work with push-to-start vehicles and factory immobilizers. To make this possible, a bypass module is typically needed. This module essentially acts like a programmed third key to bypass the immobilizer system. However, compatibility varies depending on your vehicle and the remote start system you choose. It’s best to consult a professional installer to ensure everything integrates and works smoothly.
Do I need a bypass module or a T-harness for my vehicle?
Whether you need a bypass module or a T-harness largely depends on your vehicle and the remote start system you’re using. A T-harness makes installation easier by plugging into your vehicle’s existing connectors, which means less wire splicing. On the other hand, a bypass module is usually necessary for vehicles equipped with anti-theft systems or immobilizers. To figure out exactly what your setup needs, refer to the instructions provided with your remote start system or consult a professional installer.
What can cause an app-based remote start to fail after installation?
An app-based remote start might stop working after installation for a few common reasons. One frequent issue is the system being in valet mode, which prevents remote starting. This mode can usually be turned off by pressing a specific sequence of buttons on the remote.
Other potential problems include a dead battery in the remote, incorrect or faulty wiring, or the vehicle’s safety systems detecting concerns like low coolant levels or oil pressure. To fix these issues, check the system’s configuration, replace the remote battery if needed, and address any electrical or vehicle-specific problems.
We use cookies to ensure that we give you the best experience on our website. If you continue to use this site we will assume that you are happy with it.