Ultimate Guide to Rear Entertainment Systems for Kids
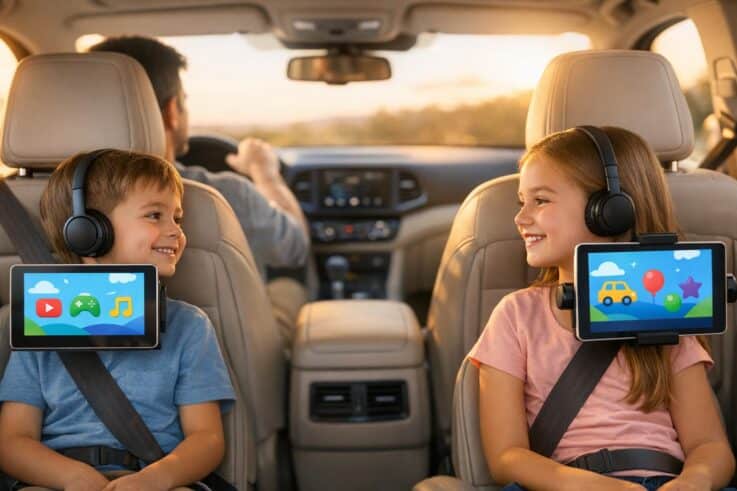
Rear entertainment systems can make family road trips less stressful by keeping kids entertained and reducing distractions for drivers. These systems, which include headrest-mounted screens, ceiling-mounted monitors, or tablet setups, now function as multimedia hubs. They allow kids to watch movies, play games, stream apps like Netflix, and even use wireless headphones for a quieter cabin. Whether factory-installed or aftermarket, these systems come with features like dual-zone playback, HDMI inputs for gaming consoles, and offline content options. Here’s what you need to know:
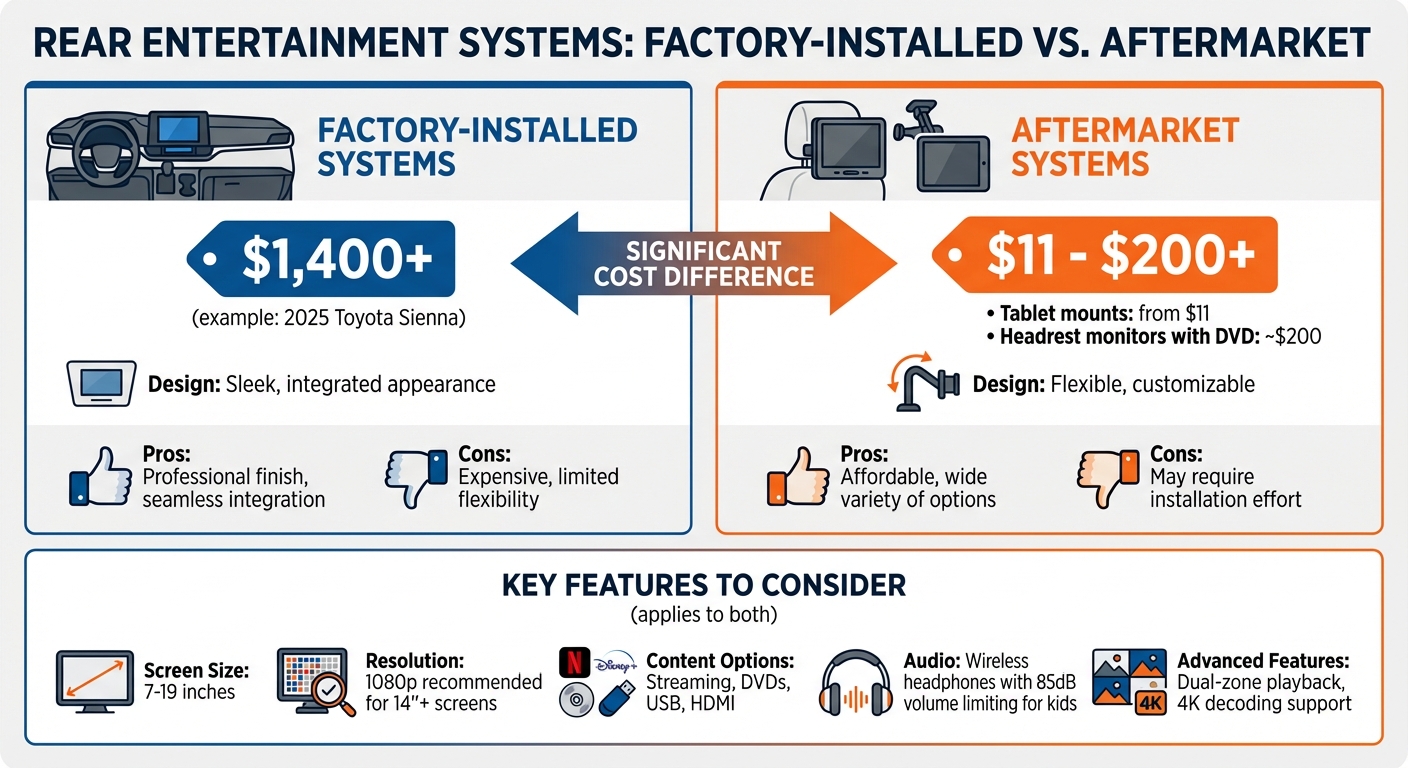
Types: Factory-installed systems offer a sleek design but are pricey (e.g., $1,400 for a 2025 Toyota Sienna). Aftermarket options are more affordable and flexible, ranging from $11 tablet mounts to $200 headrest monitors with built-in DVD players.
Features to Consider: Screen size (7–19 inches), resolution (1080p for larger screens), content access (streaming, DVDs, USBs), and wireless audio options.
Installation: DIY setups require basic tools and careful wiring, while professional installation ensures a polished finish and proper connections.
Maintenance: Clean screens with ammonia-free cleaners, update firmware regularly, and store accessories like headphones safely.
For a hassle-free setup, professional services like Auto Sound & Security offer tailored solutions, warranty coverage, and expert installation. Whether you’re preparing for a long road trip or daily commutes, these systems can transform your vehicle into a mobile entertainment center.
Factory vs Aftermarket Rear Entertainment Systems: Price and Features Comparison
Best Car DVD Players for Kids? Full Review of GOnavidio 12” Dual Screens
sbb-itb-74b4b25
Features to Consider in Child-Friendly Rear Entertainment Systems
Building on the benefits of rear entertainment systems, this section outlines key features to help you choose the best option for your family.
Screen Size and Picture Quality
Screen size plays a big role in the viewing experience and depends on where the unit is installed. Headrest monitors usually range from 7 to 10.1 inches, while ceiling-mounted models can go up to 19 inches. A 10.1-inch screen offers a much better viewing experience compared to a smaller 7-inch screen. As Mobile One Auto Sound puts it:
It’s typically best to go for the biggest screens that still fit comfortably into the headrests of your vehicle.
When it comes to resolution, the difference between 720p and 1080p is barely noticeable on an 11.6-inch screen viewed from 2.5 feet away. However, larger screens – 14 inches or more – benefit from 1080p for sharper image quality. For child-friendly systems, IPS (In-Plane Switching) screens are a solid choice. They provide wide viewing angles and maintain vibrant colors and clarity, even when viewed from the side. Additionally, systems that support 4K decoding (even if the screen itself is 1080p) ensure smoother playback of high-quality videos.
Once you’ve identified the ideal screen, it’s time to consider how you’ll access and play content.
Content Access and Playback Options
Today’s rear entertainment systems offer various ways to enjoy content. Streaming apps like Netflix, Disney+, and YouTube bring a wealth of options but require an internet connection. To avoid data charges or buffering, download content for offline viewing. For areas with limited connectivity, DVDs and Blu-ray discs remain a reliable option.
USB and SD card support lets you load digital files, such as MPEG-2 or DivX formats, onto a drive, giving you a portable library without the need for physical discs or internet access. HDMI inputs add even more flexibility, allowing you to connect gaming consoles like the Nintendo Switch or PlayStation directly to the screen. Keep in mind that a 300-watt power inverter is usually enough to power these devices in your car. For families with kids of varying ages, dual-zone playback is a lifesaver – it allows two passengers to watch completely different content at the same time, with separate audio for each screen.
Now that we’ve covered content, let’s dive into audio features that can enhance the experience even further.
Wireless Headphones and Sound Options
Wireless headphones are a must for keeping sound contained to the back seat, allowing parents to focus on driving while kids enjoy their entertainment.
For younger kids, choose volume-limiting headphones that cap sound levels at around 85dB to protect their hearing during long trips. Over-ear, noise-canceling models are often more comfortable than earbuds and help block out road noise. Entry-level noise-canceling headphones are available for under $50, while high-end options like Bose models can cost around $299.95.
If your system doesn’t include wireless headphone support, a Bluetooth transmitter like the AirFly SE (around $35) can connect wireless headphones to any standard 3.5mm audio jack. It’s also smart to have a backup plan – keep wired headphones and a basic audio splitter handy. A 5-way splitter, costing between $10 and $15, allows multiple kids to share a single audio source, which can save the day if wireless headphone batteries run out mid-trip.
How to Install Rear Entertainment Systems
Installing a rear entertainment system on your own can save you money and give you full control over the setup. However, it’s important to approach the process with careful planning and patience. Some installations are straightforward, while others may require more time and attention to detail. The key is preparation and working step-by-step.
Getting Your Tools and Vehicle Ready
Before starting, gather all the tools you’ll need. These include Phillips and flathead screwdrivers, needle-nose pliers, and a utility knife. For electrical tasks, a digital multimeter is crucial for checking connections and locating power circuits. You’ll also need wire strippers, crimpers, and butt connectors to ensure secure electrical joins.
Trim removal tools are a must to safely detach dashboard panels or molding without causing damage. Depending on your system, you might also need a drill with small bits and a ratchet with both metric and standard sockets. Make sure you’re working safely by engaging the parking brake and using wheel chocks.
To preserve your vehicle’s settings, plug a 9-volt battery saver into the cigarette lighter before disconnecting the battery. Protect wires near sharp edges by covering them with rubber tubing, and clean any metal surfaces for grounding with 320-grit emery cloth to ensure a strong electrical connection.
With your tools ready and your vehicle prepped, you can move on to securing the screens.
Mounting Headrest or Roof Screens
Headrest monitors come in two primary types: active mounts that clamp onto the existing seat posts and replacement headrests that completely replace your factory units.
For active mounts, slide the headrest up, place the provided adapters around the posts (matching the size of your headrest), and secure the mounting bracket. These brackets are typically spring-loaded or tightened with screws. Use the guides included with your system to ensure the posts fit snugly and don’t rattle.
Replacement headrests require removing the factory unit, which is often done by pressing release tabs or using a pin for locks. Thread the cables through the seat post openings before installing the new headrest. Hide the wiring by running it through the seat’s interior or tucking it behind the seat panel lip to avoid visible wires and tripping hazards.
Roof-mounted systems are more complex. Start by locating the vehicle’s internal roof support bar, which is usually a few inches behind the headliner hump. Mark the center point with masking tape and press on the headliner to confirm the bar’s location before drilling. The mounting plate must be secured directly into this metal support bar – not just the fabric headliner. As noted by Auto Image:
The installation of an overhead monitor usually requires that your installer cut a hole in the headliner.
To run the wires, use a straightened coat hanger to fish them through the headliner and into the side molding. Be careful to avoid drilling through the exterior roof.
Once the screens are securely mounted, it’s time to connect power and test the system.
Connecting Power and Testing the System
Reliable power connections are essential for a functional rear entertainment system. Start by disconnecting the battery to avoid shorts or electrical damage. There are a few ways to power the system. The simplest is using the 12V accessory outlet (cigarette lighter) with a plug or power inverter. A 300-watt inverter is sufficient for most gaming consoles and DVD players. For a cleaner, more integrated setup, you can hardwire the system directly to the vehicle’s wiring harness or fuse box. When hardwiring, make sure to connect to a power wire that’s active only when the ignition is in the "on" or "accessory" position to prevent draining the battery when the car is off.
For headrest systems, route the power and video cables through the seat covers or down the headrest post holes to keep them protected and out of sight. Once all wiring is complete, reconnect the battery and thoroughly test the system. Check the video quality, sound output, and headphone jacks to ensure everything is working properly. If the system doesn’t power on, verify that the battery is charged. For audio systems using an FM modulator, tune the factory radio to the specified frequency to broadcast sound through the car’s speakers.
Maintenance Tips for Your Rear Entertainment System
Once your rear entertainment system is installed, regular maintenance is key to keeping it in top shape. A little care goes a long way in preventing issues and protecting your investment from unnecessary wear.
Cleaning and Protecting Screens
Modern screens often come with anti-glare and anti-fingerprint coatings, which can be damaged by improper cleaning methods. Avoid household glass cleaners that contain ammonia, as they can strip these coatings and permanently affect screen clarity. Heather, a car detailing expert at Auto Care HQ, emphasizes:
Avoid using any household cleaners or strong interior cleaners on the infotainment screen as these may damage the coating which provides anti-static and anti-glare properties.
Before cleaning, power down the system – a dark screen makes smudges and streaks easier to spot. Use an ammonia-free automotive glass cleaner and spray it onto a lint-free microfiber towel (never directly onto the screen to avoid moisture seeping into the edges). Wipe in a cross-hatch pattern (vertical followed by horizontal strokes) to prevent streaking, and finish with a dry section of the towel to buff away residue. For dust trapped in screen edges, a soft detailing brush works wonders without scratching the surface. Aim to clean screens weekly to stop skin oils from degrading the protective coating.
Keeping Firmware and Apps Current
Firmware updates are essential for keeping your system running smoothly, while app updates add new features and maintain compatibility with devices like smartphones and Bluetooth headphones. Robert Ferency-Viars from Crutchfield explains the risks of using incorrect firmware:
The old firmware gets overwritten (replaced) by new operating instructions that aren’t compatible with your model, which means your device won’t work anymore. That’s referred to as ‘bricking’ your gear.
To avoid issues, register your product with the manufacturer to receive update notifications. If your system has built-in Wi-Fi, you can typically update it through the settings menu. For systems without internet access, download updates from the manufacturer’s website onto a USB drive or SD card, then insert it into the system’s media port. Always double-check that the update matches your model number, and ensure your vehicle has a stable power supply during the process to avoid interruptions. Keeping both software and accessories updated ensures everything works seamlessly.
Storing Accessories Safely
Proper storage of accessories like headphones, controllers, and cables can prevent unnecessary damage. Use storage bags or the original hardshell cases for headphones to protect them from getting crushed. For tablets and handheld devices, invest in shock-resistant cases and use headrest mounts when not in use to prevent accidental drops. Keep a dedicated set of durable charging cables in your car – opt for reinforced cables with sturdy connectors that can withstand frequent use, especially by kids. Organizers or cable ties can help prevent tangling and fraying. For overhead monitors, fold the screen up against the roof when not in use to shield the LCD from impacts. Gaming consoles should be stored in padded carrying cases for added protection.
Professional Installation at Auto Sound & Security
Expert Installation Services
Getting your vehicle’s entertainment system professionally installed can save you from the headaches of DIY errors. Auto Sound & Security has been in business since 2002, with a team boasting over 20 years of experience in vehicle modifications. Their technicians handle everything from secure mounting to ensuring proper power connections, leaving no room for error.
For those who prefer to leave it to the pros, this service guarantees a seamless setup. Professional installers are familiar with vehicle-specific quirks that DIY enthusiasts might miss. For example, modern cars with Start/Stop engine systems need voltage stabilizers to keep entertainment systems running during engine restarts. The team also avoids common DIY pitfalls, like messy dangling cables or unsightly velcro strips cluttering your car’s interior.
As National Auto Sound & Security puts it:
"Our experienced installation staff has the years of experience to do your job right. We’ll test the installation when we’re done, making sure your equipment is adjusted for top performance."
National Auto Sound & Security
Their expertise even extends to designing custom setups tailored to your specific vehicle.
Custom Entertainment Solutions
Auto Sound & Security takes customization seriously, creating systems that fit your family’s needs and your vehicle’s layout. As an authorized dealer for brands like Pioneer, Kenwood, JVC, and Alpine, they offer a variety of options, such as seat-back systems that integrate into headrests or roof-mounted LED-backlit monitors for larger vehicles.
But customization doesn’t stop at screen size. Installers can tailor systems to match your media habits. Whether you prefer built-in DVD players for reliable physical media or Android-based tablets for streaming services like Netflix, YouTube, and Prime Video, they’ve got you covered. They also add HDMI inputs for gaming consoles and smart devices like Amazon Fire Stick or Roku. To keep things distraction-free, dual-channel wireless headphones and FM modulators are included. Premium setups may even feature VOXXLINK, enabling parents to control rear screens via smartphone, and systems can come with 16GB of onboard storage for offline content – perfect for long trips through areas with spotty cell service.
Support and Warranty Coverage
Auto Sound & Security backs their professional installations with solid warranty coverage. Every installation includes at least a one-year warranty against defects in materials or workmanship, and some locations even offer a free lifetime installation warranty. This coverage includes free troubleshooting, as well as removal and re-installation if a covered product needs servicing within the first 90 days, with extended support up to a year for certain products. Additionally, defective products can be exchanged over the counter within the first 90 days, with some models eligible for exchanges for up to a year.
All installations follow the Magnuson-Moss Warranty Protection Act, ensuring your aftermarket system won’t void your vehicle’s factory warranty . After the installation, the team provides a free setup and demonstration, so you can start using your new system right away.
National Auto Sound & Security reinforces their dedication to customer satisfaction:
"If something goes wrong with the install we’ll fix it at no charge."
National Auto Sound & Security
Conclusion
Making Family Road Trips Better
Rear entertainment systems can make road trips a lot smoother by keeping kids entertained and minimizing distractions. With kids quietly enjoying their favorite shows or games through wireless headphones, drivers can stay focused on the road.
These systems are more than just screens – they’re full multimedia hubs. They support everything from DVDs to streaming services like Netflix and YouTube, gaming consoles, and even offline downloads. As MotorVero explains:
Keeping children of all ages engaged on long journeys is essential for creating a memorable road trip experience.
Upgrade your system and see how it transforms your travel experience.
Get Started with Auto Sound & Security
If you’re ready to enjoy a more peaceful and fun road trip, professional installation is the way to go. With over 20 years of experience, Auto Sound & Security ensures every installation is seamless and tailored to your needs.
As authorized dealers for brands like Pioneer, Kenwood, JVC, and Alpine, they offer a variety of options, from Android-based streaming tablets to built-in DVD players and systems with HDMI inputs for gaming. Every installation includes warranty coverage and a hands-on demonstration, so you’re ready to hit the road right away while also adding value to your vehicle.
Reach out to Auto Sound & Security today to explore your options and schedule your professional installation.
FAQs
Which rear entertainment system type is best for my vehicle?
When it comes to choosing the best rear entertainment system, it all boils down to your specific needs, budget, and what you value most. Factory-installed systems are a solid choice if you’re looking for seamless integration and the added benefit of a warranty. On the other hand, aftermarket options – like headrest DVD players or overhead monitors – can save you money and offer more flexibility.
For families gearing up for long road trips, dual DVD players or tablet mounts can be a lifesaver for keeping kids entertained. As you decide, think about factors like how complex the installation might be, whether the system supports the media formats you use, and how much you’re willing to spend. The right system will depend on balancing these priorities with what works best for your vehicle.
How can my kids watch shows without Wi-Fi on the road?
To make trips more enjoyable for your kids without relying on Wi-Fi, consider downloading their favorite movies, TV shows, or videos ahead of time. You can save this content onto a tablet, smartphone, or portable media player. If your vehicle has a rear entertainment system, many of these support playback from USB drives or SD cards. By loading videos onto these devices before your trip, your kids can stay entertained without needing an internet connection.
Can an aftermarket system drain my car battery?
An aftermarket rear entertainment system can pull power from your car battery if used for extended periods while the engine is off, particularly if the battery isn’t in great shape. On the other hand, when the engine is running, these systems typically draw power from the vehicle’s electrical system, making it unlikely to cause any noticeable battery drain.
To schedule an appointment with your friendly neighborhood experts at Car Repair Services, give us a call at +1 718-470-2223 or fill out the form below with your information and requested services. One of our team members will get back to you as soon as possible to confirm your appointment.
mailing list to receive updates on new arrivals, offers and other discount information.
We use cookies to ensure that we give you the best experience on our website. If you continue to use this site we will assume that you are happy with it.Ok