Pros and Cons of DIY vs Professional Window Tinting
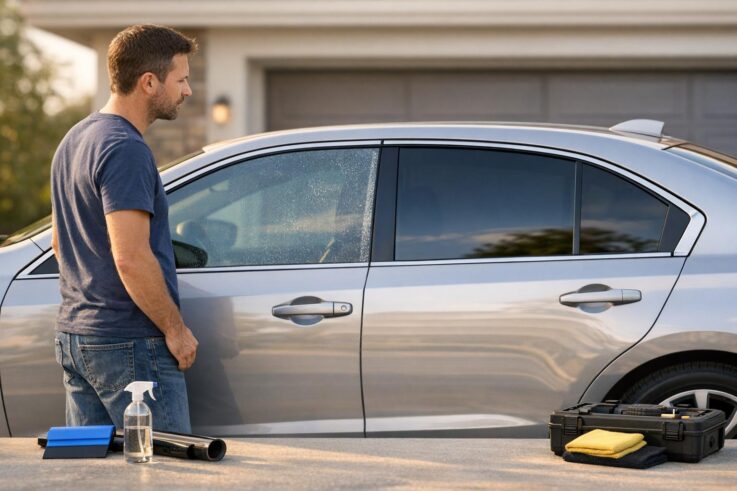
Window tinting can improve your car’s look, block UV rays, reduce heat, and add privacy. But should you do it yourself or hire a professional? Here’s the quick breakdown:
DIY Tinting: Costs less (as low as $20), but requires skill and patience. Mistakes like bubbles or peeling are common, and the tint may only last 1–3 years.
Professional Tinting: Costs more ($250–$500), but guarantees a flawless finish, longer lifespan (5–10+ years), and often includes warranties. Professionals also ensure compliance with local tinting laws.
Quick Comparison
Feature
DIY Tinting
Professional Tinting
Cost
$20–$150
$250–$500+
Time
4–6+ hours
1–4 hours
Skill Needed
High
None
Lifespan
1–3 years
5–10+ years
Warranty
Rare/None
Common
Error Risk
High
Low
Tools
Extra purchase
Included
Legal Compliance
Your responsibility
Guided by expert
DIY is best for budget-conscious, hands-on people with time to spare. Professional services are ideal for those seeking long-term quality and convenience. Choose based on your budget, skill level, and expectations.
DIY vs Professional Window Tinting: Cost, Time, and Quality Comparison
DIY Window Tinting: Advantages and Disadvantages
Advantages of DIY Window Tinting
One of the biggest perks of DIY window tinting is the cost savings. By skipping professional labor, you can save anywhere from $150 to $600, depending on your car and the type of tint film you choose. Basic kits start as low as $20, while premium pre-cut kits hover around $60. You might also need to spend an extra $10–$20 on tools, but even with that, the total cost remains significantly lower than a professional job.
Another advantage is the flexibility it offers. You can work at your own pace, without needing to schedule appointments or wait for shop availability. Everything is in your hands – from picking the film type and darkness level to taking as much time as you need for installation. Pre-cut kits tailored to specific vehicle models simplify the process, eliminating tricky measurements and reducing the chances of damaging glass or weather stripping.
However, while the savings and convenience are appealing, DIY tinting comes with its own set of challenges.
Disadvantages of DIY Window Tinting
DIY window tinting requires patience and precision, and it’s not uncommon for first-timers to run into trouble. Over 60% of beginners report issues like air bubbles and creases during installation. Poor glass preparation is a common culprit, with 90% of bubble-related failures tracing back to this step.
The application itself is tricky. Working with flat film on curved windows can be frustrating and may even damage delicate parts like defroster lines. To get it right, you’ll need a controlled environment – ideally a dust-free garage with temperatures between 70°F and 80°F. After installation, you’ll also need to avoid rolling down the windows for 3 to 5 days to allow the adhesive to cure properly.
Mistakes can be costly. If you mess up, you might have to buy new film or even pay for professional reinstallation, which can wipe out any savings. Additionally, DIY tint films generally last only 1 to 3 years, compared to the 5 to 10+ years you’d get with professional-grade materials. Low-quality dyed films are especially prone to discoloration and bubbling over time.
These drawbacks highlight important considerations, which will be explored further when comparing DIY tinting to professional services in the next section.
sbb-itb-74b4b25
Professional Window Tinting: Advantages and Disadvantages
Advantages of Professional Window Tinting
Having your windows tinted by a professional offers precision and expertise that’s hard to achieve on your own. Technicians are skilled at managing tricky areas like curved rear windows with defroster lines. They often rely on computerized cutting tools (CNC plotters) to ensure the film fits your vehicle perfectly, avoiding uneven edges and guesswork.
The materials used also set professional installations apart. Trusted brands like 3M, XPEL, and LLumar provide high-quality films, including ceramic and carbon options. These films can block up to 99% of harmful UV rays and significantly reduce heat inside the car. With proper care, they can last 5 to 10 years – much longer than most DIY kits. Additionally, professional installations are carried out in controlled, dust-free environments to ensure a flawless finish.
Another key advantage is legal compliance. Professionals understand local laws regarding tint darkness (VLT percentage) and reflectivity, ensuring your vehicle meets regulations and helping you avoid fines. Many shops also offer warranties covering issues like bubbling, peeling, or discoloration – something rarely included with DIY kits. Plus, professionals typically complete the job within 1 to 4 hours, saving you time compared to tackling it yourself.
However, professional tinting isn’t without its downsides.
Disadvantages of Professional Window Tinting
The biggest drawback is the cost. Professional installations usually range from $250 to $500 for mid-range ceramic or carbon tints, which is significantly more expensive than DIY kits, often priced under $100. For car owners on a tight budget, this higher upfront cost can be a tough pill to swallow.
Scheduling can also be a hassle. You’ll need to book an appointment ahead of time, and depending on the shop’s availability, you might have to wait several days for a slot. During the 1 to 4-hour installation, you’ll be without your vehicle, which can be inconvenient. Additionally, some car owners feel they lose a sense of control over the process when leaving the work in someone else’s hands.
DIY vs PRO Car Window Tinting!
Side-by-Side Comparison: DIY vs Professional Window Tinting
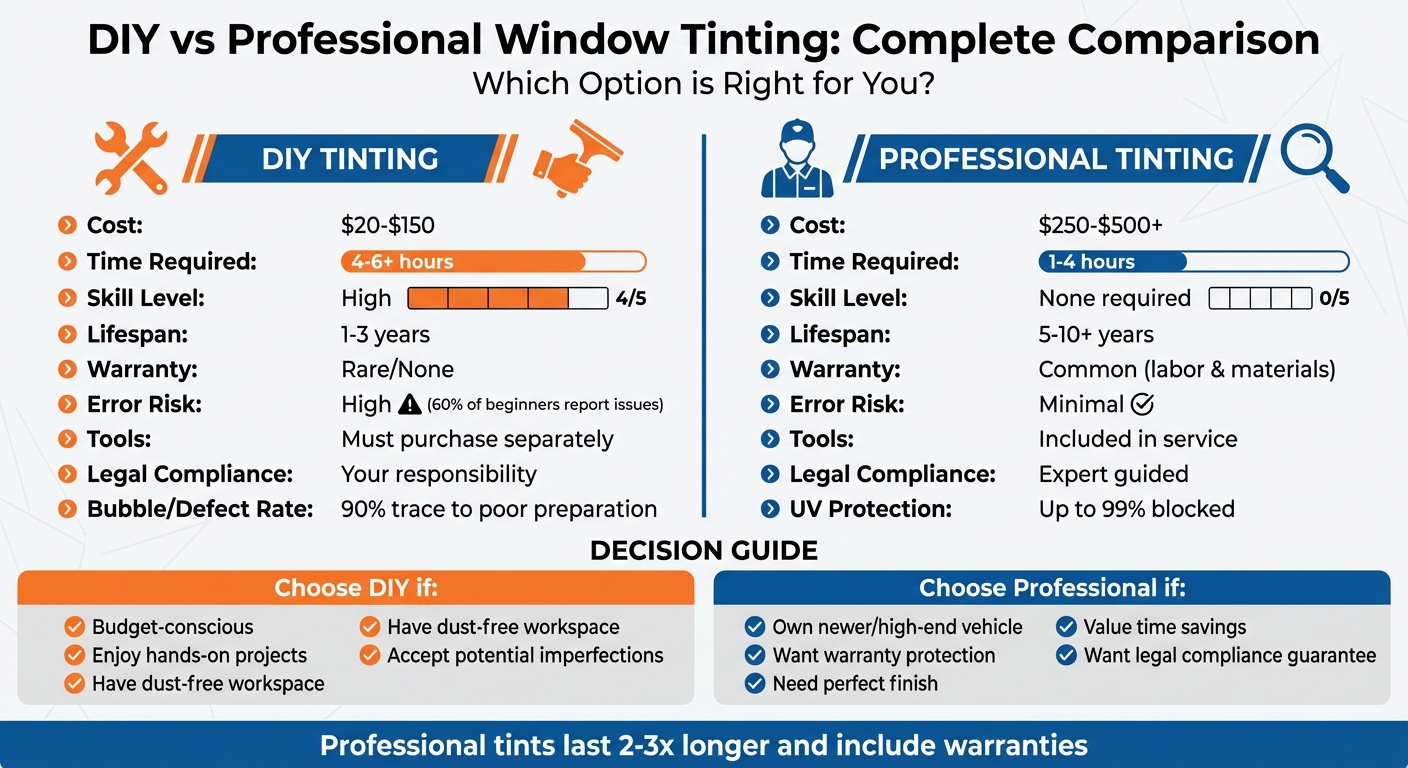
When deciding between DIY and professional window tinting, it’s helpful to see the differences side by side. The table below highlights the key aspects of each option, making it easier to understand what you’re getting into with either choice.
Feature
DIY Window Tinting
Professional Window Tinting
Upfront Cost
Low ($20 – $150)
Higher ($150 – $500+)
Time Investment
4 – 6+ hours
1 – 4 hours
Skill Required
High (precision cutting/shrinking)
None (handled by experts)
Lifespan
1 – 3 years
5 – 10+ years
Warranty
Rare/None
Common (Labor & Materials)
Error Risk
High (bubbles, dust, peeling)
Minimal (guaranteed finish)
Tools Needed
Must purchase separately
Included in service
Legal Compliance
User’s responsibility
Guided by a professional
This table gives a clear snapshot of how DIY and professional tinting stack up. While DIY might seem cost-effective upfront, mistakes like bubbles, dust, or improper cuts can quickly eat into those savings. Fixing errors often means buying more film or even turning to a professional for corrections.
Time and skill are other major factors to consider. DIY projects can take hours, and achieving a flawless finish requires precision tools and techniques. In contrast, professionals work in controlled environments with advanced equipment, ensuring perfect results even on tricky surfaces like curved windows or those with defroster lines.
Professional-grade films, such as ceramic or carbon options, offer additional perks. They block up to 99% of UV rays and are resistant to issues like bubbling or discoloration, which are common with cheaper DIY films. The extended lifespan and availability of warranties further underscore the long-term benefits of professional installation.
Up next, see how Auto Sound & Security takes these advantages a step further, offering a seamless and reliable tinting experience.
Professional Window Tinting Services at Auto Sound & Security
At Auto Sound & Security, window tinting isn’t just about applying film – it’s about precision and expertise. Their team uses advanced tools, like heat guns and precision-cutting techniques, to achieve a flawless finish. This method ensures the film fits perfectly around curved windows and defrost lines, avoiding the common pitfalls of DIY attempts, such as bubbles, creases, or trapped dust. As Automotive Specialty Wraps explains:
Professional-grade application ensures an even finish free from defects such as bubbles or creases.
Auto Sound & Security uses top-tier ceramic and carbon films, which block up to 99% of harmful UV rays without interfering with GPS, mobile signals, or other electronic systems. These films are built to last, resisting fading, peeling, and discoloration for 5 to 10 years. The installation process, which takes between 1 and 4 hours, is conducted in a clean, controlled environment, and every job is backed by a comprehensive warranty covering both materials and workmanship.
But the services don’t stop at window tinting. Auto Sound & Security offers a range of vehicle upgrades, coordinating tinting appointments with installations for security systems, audio enhancements, and dash cams. As authorized dealers for leading brands like Viper, Compustar, Kicker, Pioneer, Kenwood, JVC, and Alpine, their technicians ensure all systems work together seamlessly.
Another standout feature of their service is expert advice on local tinting laws. They’ll guide you through state-specific regulations on light transmittance, helping you avoid fines and ensuring your vehicle remains compliant. Their professional process not only safeguards your investment – particularly in newer or high-end vehicles – but also delivers a sleek, factory-quality finish.
Conclusion: Choosing Between DIY and Professional Window Tinting
Deciding between DIY and professional window tinting comes down to your budget, skill level, and expectations for the final result.
DIY might be the way to go if you’re working with a tight budget, enjoy tackling hands-on projects, and have access to a clean, dust-free workspace. Keep in mind, though, that DIY installations may result in small imperfections like bubbles or slight misalignment. You’ll also need to research local Visible Light Transmission (VLT) laws to ensure your tint complies with regulations.
On the other hand, professional installation is ideal if you own a newer or high-end vehicle, want a perfect finish backed by a warranty, need advanced films like ceramic for better heat rejection, or simply don’t have the time to spend on a multi-hour project. Professional services generally cost between $250 and $500 for sedans, take about 2 to 4 hours, and guarantee compliance with state laws. Plus, warranties from professional installers offer added peace of mind.
While DIY kits can save you money upfront, professionally installed tints often last 5 to 10 years with proper care. In contrast, entry-level DIY films are more likely to fade, bubble, or develop an unattractive "purple" tint over time. If a DIY attempt goes wrong, the added expense of professional removal and reinstallation could cancel out any initial savings. Ultimately, your decision should weigh the initial cost against the long-term durability and convenience of the results.
For those prioritizing professional quality, Auto Sound & Security (https://autosoundnyc.com) offers expert installations, premium film options, and reliable warranties in a controlled, dust-free environment.
FAQs
What tint film type should I choose (dyed, carbon, or ceramic)?
When deciding on a window tint, your choice will depend on what matters most to you – cost, performance, or durability.
Ceramic tint stands out for its excellent heat rejection and long-lasting durability, making it the top performer. However, it comes with a higher price tag.
Carbon tint offers a middle ground, delivering decent heat reduction and durability at a more moderate cost.
Dyed tint is the most budget-friendly option. It enhances privacy and adds a sleek look but falls short in heat rejection and longevity.
If you’re after the best performance, ceramic tint is the way to go. On the other hand, dyed tint works well for those prioritizing affordability. Carbon tint strikes a balance between the two.
How can I avoid bubbles and dust if I tint my windows myself?
To get a smooth and clean result while applying window tint yourself, make sure to work in a dust-free indoor area. Start by thoroughly cleaning the window surface to remove any dirt or debris. When applying the film, use a squeegee or straight edge to carefully smooth it out and prevent bubbles. If small bubbles appear, you can gently prick them with a pin and smooth them out again. However, if you notice stubborn bubbles or dust trapped beneath the film, you might need to peel it off and reapply for a better finish.
What VLT percentage is legal for my state?
The permitted Visible Light Transmission (VLT) percentage for window tinting differs by state, usually falling between 24% and 70% for front side windows. Be sure to review your state’s regulations to stay within the legal limits for tinting.
We use cookies to ensure that we give you the best experience on our website. If you continue to use this site we will assume that you are happy with it.