Checklist for Choosing Gaming Rear Entertainment Systems
Looking to install a gaming system in your vehicle? Here’s what you need to know:
Compatibility: Match the system to your car’s size, power setup, and layout. SUVs can handle larger ceiling-mounted screens, while smaller cars may need headrest-mounted options.
Connectivity: Ensure HDMI ports are available for gaming consoles like PlayStation or Switch. Wireless headphones and multi-zone audio can minimize distractions for the driver.
Power Requirements: Most consoles need a 300-watt inverter if your car lacks a standard outlet.
Budget: Costs range from $200 for basic systems to $2,000 for advanced setups, plus installation fees.
Installation Options: Choose between portable setups for flexibility or fixed installations for a polished look.
The right system can make road trips enjoyable and even increase your car’s resale value. Keep reading for detailed steps on selecting and installing the perfect gaming entertainment system.
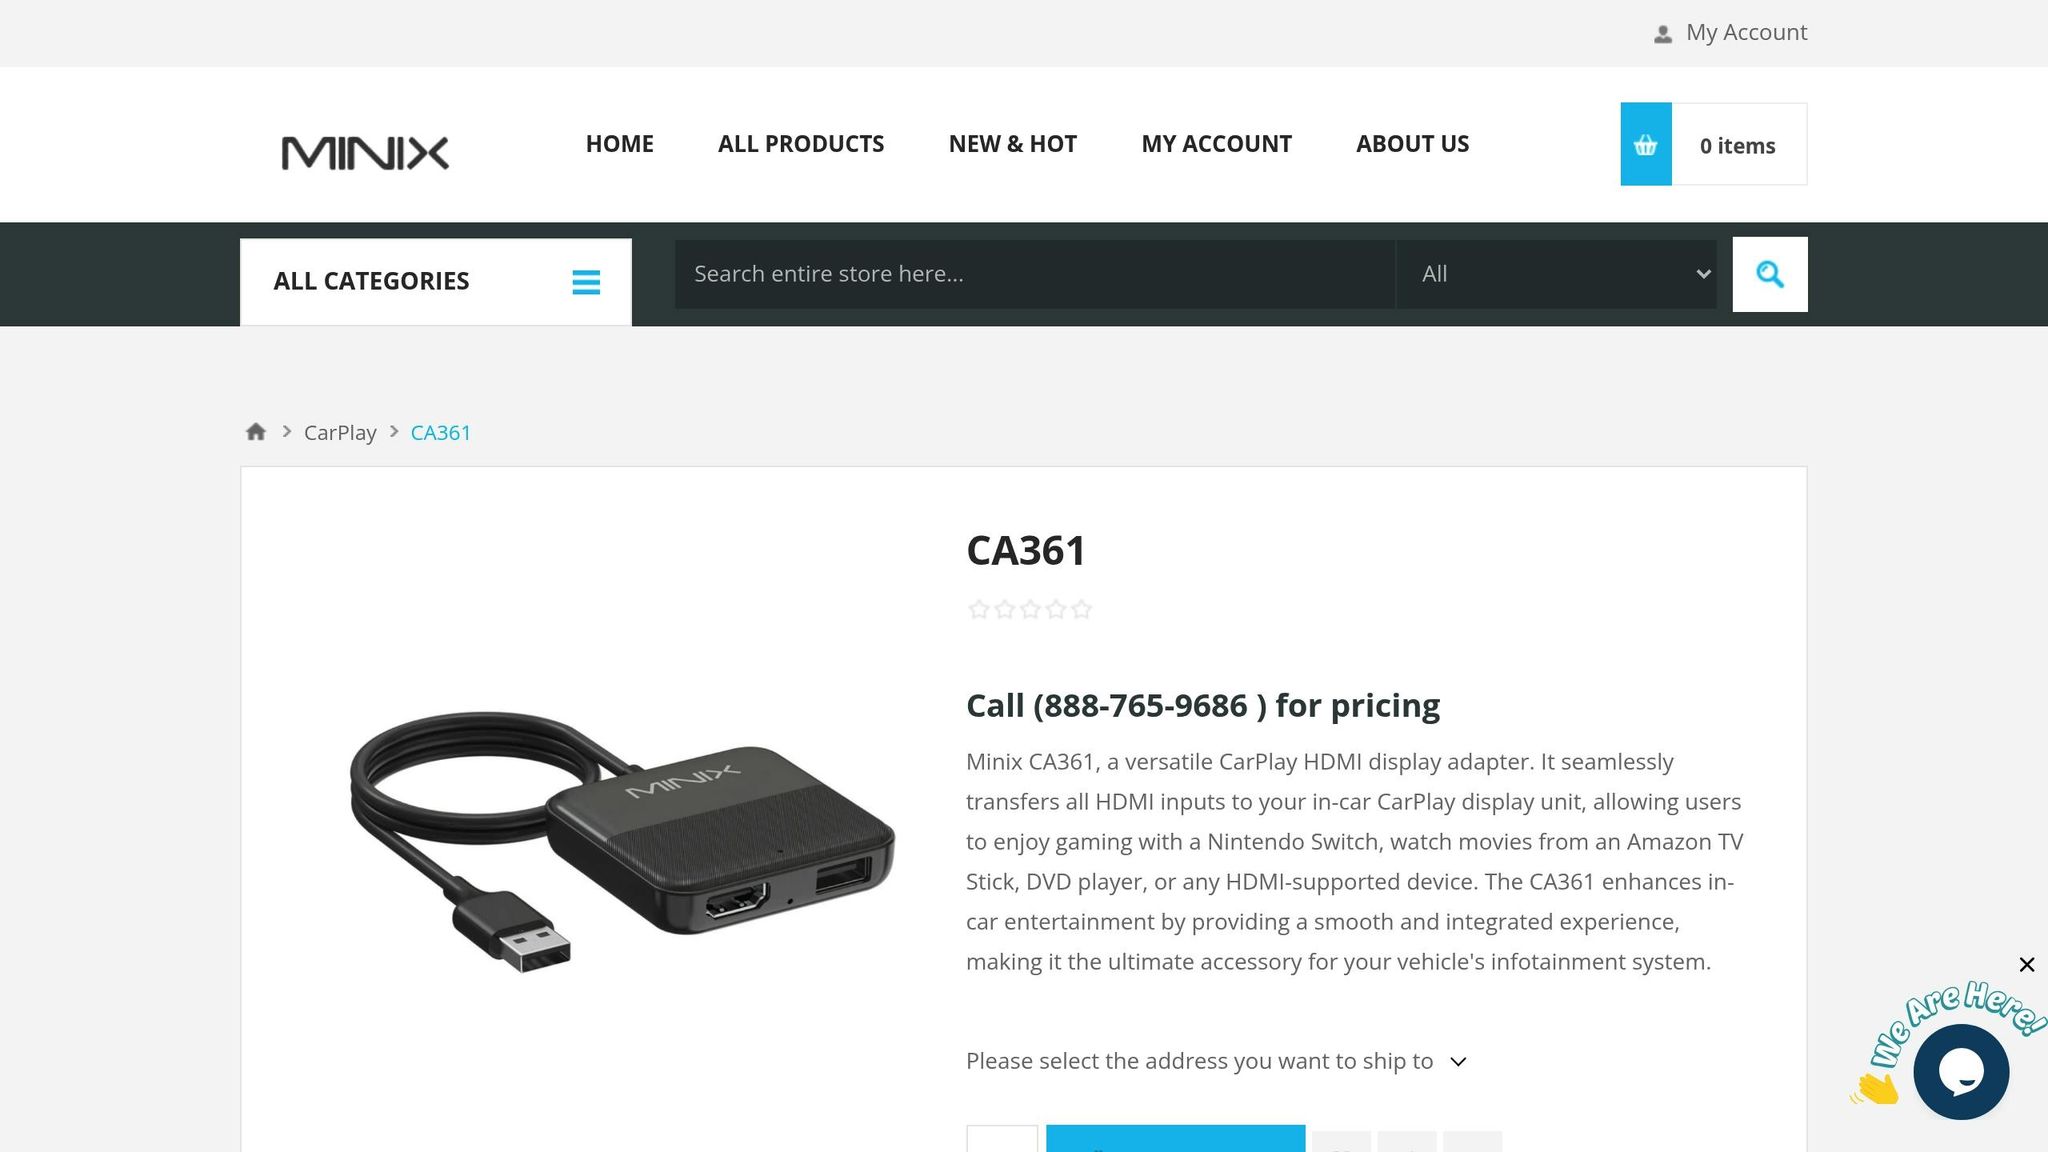
Playing Video Games on my Car’s Radio!? HDMI Input for CarPlay – MINIX CA361 Review
sbb-itb-74b4b25
Step 1: Determine Your Gaming and Vehicle Requirements
Gaming Rear Entertainment System Budget Breakdown and Cost Comparison
Identify How You’ll Use the System
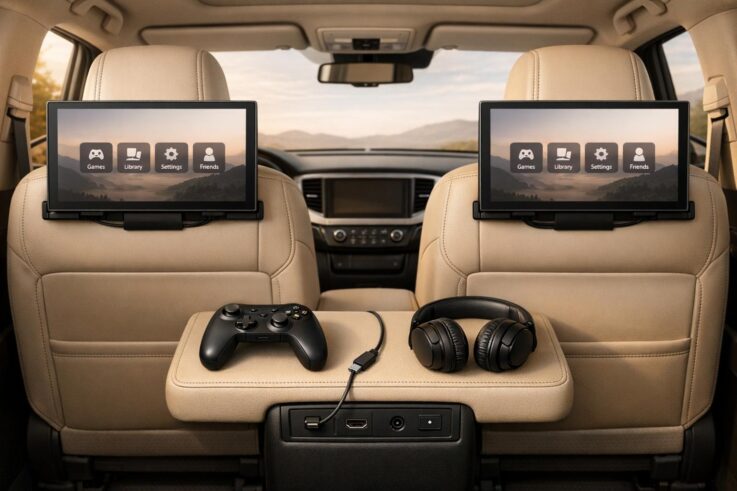
First, think about who will be using the system and how often. If you’re planning frequent road trips with kids, a dual-zone audio setup is a game-changer. It lets passengers enjoy gaming independently without distracting others in the car. Look for systems with HDMI or auxiliary A/V inputs so you can connect consoles like PlayStation, Xbox, or Nintendo Switch.
Do you need support for physical media? If you often drive through areas with spotty internet, having a built-in DVD or Blu-ray player can keep everyone entertained. For streaming apps like Netflix or YouTube, make sure the system supports digital media through USB or SD card slots. And for a quieter cabin, consider wireless infrared headphones – they allow passengers to game or watch movies without disturbing the driver.
Verify Vehicle Compatibility
Your car’s design plays a big role in choosing the right system. Overhead monitors, typically sized between 7 and 15 inches, mount to the ceiling and work well for larger vehicles. On the other hand, headrest monitors are placed directly in front of passengers and won’t block anyone’s view. Be mindful of installation challenges that might come with your vehicle’s layout.
Check your car’s power setup, too. Most rear entertainment systems run on a standard 12V DC outlet, but gaming consoles often need a household-style power outlet or a 300-watt power inverter. If you’re leasing your car, portable options like tablet mounts or replacement headrests might be better than permanent installations.
Once you’ve figured out compatibility, take a look at your budget to see what’s feasible.
Establish Your Budget
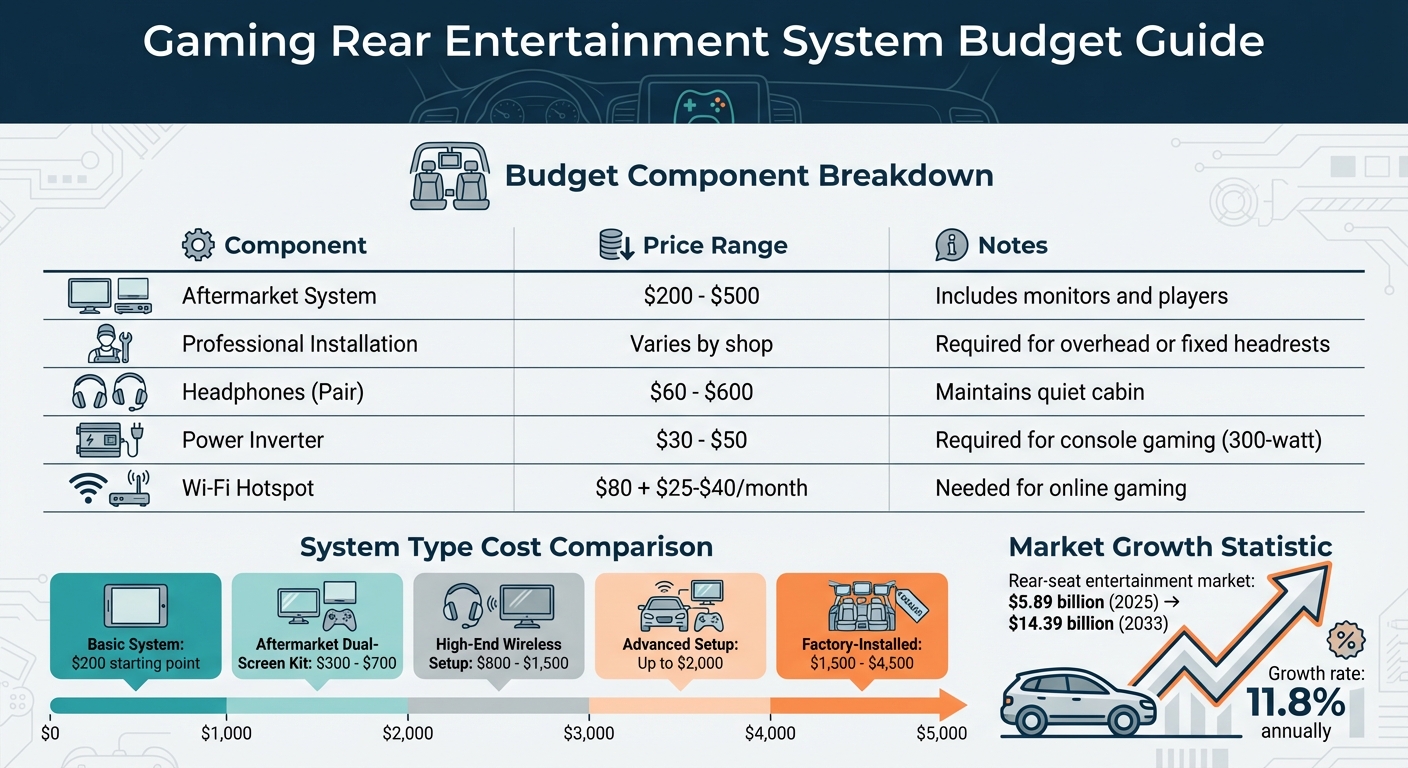
Set a realistic budget in US dollars based on your needs. Basic systems start at around $200, while more advanced setups that work with gaming consoles can cost up to $2,000. Don’t forget to factor in installation fees and accessories like headphones and power inverters.
Budget Component
Estimated Cost
Notes
Aftermarket System
$200 – $500
Includes monitors and players
Professional Installation
Varies by shop
Needed for overhead or fixed headrests
Headphones (Pair)
$60 – $600
Helps maintain a quiet cabin
Power Inverter
$30 – $50
Required for console gaming
Wi-Fi Hotspot
$80 + $25–$40/month
Needed for online gaming
Step 2: Identify Required Gaming Features
Screen Size and Display Quality
Once you’ve outlined your system requirements, it’s time to focus on the display. The screen size and resolution play a huge role in creating an immersive gaming experience. Look for a screen that fits comfortably in your vehicle without taking up too much space. It’s also worth measuring the available area to ensure a proper fit. A responsive touchscreen makes navigation a breeze, and you’ll want a sturdy build to handle the inevitable bumps and vibrations of the road.
Connection Ports and Wireless Options
Connectivity is key for an uninterrupted gaming setup. Make sure the system includes essential ports like HDMI, USB, and SD card slots, as well as wireless options such as Bluetooth or IR (infrared). HDMI is especially important for console gaming – having it built-in avoids the hassle of adapters. USB and SD slots are great for playing local media files or powering streaming devices like Roku or Amazon Fire TV.
For audio, wireless options like Bluetooth or IR enable passengers to use headphones without disturbing the driver. If your car doesn’t already have Bluetooth, you can always add a Bluetooth adapter to connect wireless headphones.
System Performance and User Experience
A smooth interface is non-negotiable for a great gaming experience. Laggy controls or slow systems can ruin the fun, so opt for setups with responsive touchscreens or control panels. Ensure the HDMI connection supports high-resolution video to minimize lag during gameplay. If DVD playback is part of your setup, look for systems with anti-vibration technology to prevent skips while driving.
To enhance the overall experience, consider multi-zone audio. This feature allows game audio to play through rear-seat headphones while the driver listens to the radio through the car’s speakers. Some factory systems even offer advanced options like Honda’s "CabinTalk", which lets the driver make announcements without passengers needing to remove their headphones.
Finally, if you’re using tablets for gaming, make sure the system includes high-current USB ports. These will keep devices charged during processor-heavy gaming sessions.
Step 3: Choose Your Mounting and Installation Method
Headrest-Mounted Options
Headrest-mounted systems are a great choice for solo gaming in SUVs or minivans. You’ll find two main types: portable clamp-on monitors and replacement headrest units. Clamp-on monitors attach easily to adjustable headrest posts – no tools required – and can hold tablets up to 13 inches. On the other hand, replacement headrest units, like the Audiovox MTGHRD1 (priced around $199.99), offer a more polished look. These come with built-in DVD players and HDMI ports but require running wires through your seat upholstery for installation.
One important note: don’t replace factory headrests in vehicles with active headrest systems (those tied to airbag sensors). Doing so can compromise passenger safety. If you’re looking for shared gaming options, overhead solutions might be a better fit.
Ceiling-Mounted or Drop-Down Options
For group gaming or multiplayer setups, overhead monitors are the way to go. These systems feature one large screen (usually 10 to 15 inches) that folds away when not in use. Installation involves cutting into the headliner and securing the bracket to the roof’s support structure. Before you decide, measure the distance between the roof and seat tops to ensure the screen won’t block your rearview mirror when in use. Many of these units replace the factory dome light, making use of existing wiring and space.
Keep in mind, this is a permanent modification, so it’s not ideal for leased vehicles. If you need more flexibility, a portable system might be a better fit for your needs.
Portable vs. Fixed Installation
When it comes to mounting systems, portable and fixed installations each have their pros and cons. Portable setups, like tablet or smartphone holders, are budget-friendly, with prices starting as low as $11. They’re perfect for occasional use and allow passengers to easily remove devices for use elsewhere. However, they can lead to cable clutter and require separate charging solutions.
Fixed installations, on the other hand, provide a sleeker, more integrated look but require careful planning. If you’re using a gaming console, you might need a 300-watt power inverter if your vehicle doesn’t already have a household outlet. When running cables for headrest monitors, be sure to protect them with a rubber hose if they pass near metal braces. And always disconnect the negative battery cable before starting any electrical work.
For more complex setups, like overhead systems or custom installations, seeking professional help is a smart move. Auto Sound & Security offers expert advice to ensure everything is installed safely and correctly. Professional guidance can help you avoid common pitfalls, such as accidentally drilling through the roof or interfering with your vehicle’s safety systems.
Step 4: Select Compatible Brands and Systems
Trusted Brands for Gaming Systems
When you’re in the market for a gaming rear entertainment system, it’s smart to stick with well-known brands like JVC, Pioneer, and Alpine – all recognized for their high-quality automotive electronics. Buying from authorized dealers, such as Auto Sound & Security, ensures you’re getting genuine products backed by full manufacturer warranties.
For aftermarket options, brands like Audiovox, Soundstream, Dual, and Naviskauto provide headrest or overhead-mounted systems equipped with modern features like HDMI, USB, and SD card slots.
Match Systems to Your Vehicle Model
Once you’ve chosen a reputable brand, the next step is to make sure the system fits your vehicle’s design and layout. Certain family-friendly vehicles, including the Honda Odyssey, Toyota Sienna, Chrysler Pacifica, and Honda Pilot, often have specific mounting and electrical requirements. For instance, the Honda Odyssey Touring Elite comes with a factory-installed 16.2-inch ultra-wide screen that even supports built-in video game consoles. If you’re adding an aftermarket system, it’s crucial to match the screen size and mounting style to avoid interfering with features like sunroofs or safety systems – issues we discussed earlier in the installation section.
Vehicle Model
Screen Type
Key Gaming Features
Honda Odyssey
10.2-inch Widescreen (Ceiling)
HDMI, 110V outlet, CabinTalk (pauses gaming for announcements)
Toyota Sienna
Split-Widescreen (Ceiling)
Dual-source viewing and HDMI compatibility
Chrysler Pacifica
Dual Seatback Screens
180° swivel, built-in games (checkers, math), HDMI
Honda Pilot
10.2-inch (Ceiling)
HDMI, 115V outlet, wireless headphones included
Keep in mind that higher trim levels of these vehicles may already include factory HDMI ports and power outlets. Once you’ve confirmed compatibility, it’s time to look into accessories that can enhance the system’s functionality.
Add-On Accessories to Consider
The right accessories can make a gaming system far more enjoyable. Wireless headphones – whether infrared or Bluetooth – are a must for keeping game audio contained to the rear seats, helping drivers stay focused. If your system doesn’t support Bluetooth, a Bluetooth transmitter like the AirFly SE (priced around $35) can easily add wireless connectivity.
Other handy accessories include parental controls to manage content based on age ratings, high-current USB ports for charging controllers and devices, and secure storage solutions to keep consoles safe when the car is parked. If you’re considering an aftermarket head unit, look for one with dual-zone audio capability, allowing rear passengers to game while the front cabin enjoys separate audio.
Step 5: Complete Your Pre-Purchase Review
Before making your purchase, take the time to confirm your power setup, warranty coverage, and installation details. This will help ensure your system works smoothly and lasts over time.
Confirm Power Requirements
Your car’s electrical system operates on 12-volt DC power, but most gaming consoles and home electronics need 110- to 120-volt AC power. To bridge this gap, you’ll need a power inverter. Make sure the inverter’s wattage is higher than the combined load of all your devices. For reference:
Smartphones and laptops: 50–100 watts
Small TVs and gaming consoles: 250–300 watts
Once you’ve calculated your total wattage, add a 10–20% buffer for safety. If your setup requires more than 150 watts, it’s better to hard-wire the inverter directly to your car’s battery instead of using the 12-volt cigarette lighter port. Look for inverters with features like low-voltage alarms or automatic shut-off to avoid draining your car battery. As inverter user Jose Saavedra points out:
The inverter should have a low voltage alarm, so you have enough power to start the engine or generator in the morning.
After addressing power needs, shift your focus to warranty coverage and durability.
Check Warranty and Build Quality
Confirm that the warranty includes coverage for critical components like LCD touchscreens and internal players. Well-known brands such as JVC, Pioneer, and Alpine often provide better support and warranty terms. Since gaming systems in vehicles face constant road vibrations and frequent use, durability is key. Look for shock-resistant features to protect against hardware failure caused by vehicle movement. If you’re assembling a portable gaming setup, consider shock-resistant cases to shield controllers and accessories from damage due to drops or bumps.
Additionally, check that the manufacturer or dealer offers reliable customer support in case you encounter any issues.
Get Professional Installation Advice
A professional installer can make a big difference in setting up your system. They can configure features like dual-zone audio, allowing rear passengers to enjoy gaming or movies without distracting the driver. Installers can also assess your car’s power needs to determine whether you require a dedicated inverter or high-current USB ports.
If you’re planning a road trip, schedule an appointment with a mobile electronics specialist, such as Auto Sound & Security, at least two to three weeks before your desired installation date. They can recommend custom installation packages that integrate rear entertainment systems with your existing car audio and video setup. Many professional installers also offer warranties on their work, ensuring peace of mind.
For leased vehicles, ask about non-permanent mounting options. For instance, overhead monitors often require cutting into the headliner, which would need to stay with the car at the end of the lease.
Conclusion
Picking the right gaming rear entertainment system can transform your car into a mobile gaming hub, keeping passengers entertained while ensuring the driver stays focused. By following a thoughtful checklist – covering everything from gaming preferences and budget to brand compatibility – you can make a choice that perfectly suits your family’s needs.
The rear-seat entertainment market is expected to grow significantly, from $5.89 billion in 2025 to $14.39 billion by 2033, with an annual growth rate of 11.8%. Choosing the right system not only meets your immediate requirements but also aligns with a booming industry. As vintage car enthusiast and author Andre Silva explains:
The core function is to transform the vehicle into a mobile entertainment space, reducing travel fatigue and increasing perceived ride quality.
Whether you go for a factory-installed system ($1,500–$4,500), a more affordable aftermarket dual-screen kit ($300–$700), or a high-end wireless setup ($800–$1,500), all of these options can enhance your vehicle’s resale value. This is especially appealing to families in the market for pre-owned SUVs and minivans. Features like dual-zone playback and wireless headphones allow passengers to enjoy their own content without disrupting each other – or the driver.
For the best results, professional installation ensures your system works seamlessly and blends well with your car’s interior. Specialists like Auto Sound & Security can provide expert installation, guaranteeing years of reliable entertainment on the road.
FAQs
What screen size is best for my vehicle?
The best screen size for your car largely depends on the space available in your vehicle and what you personally prefer. Most options fall between 7 and 15 inches, but 10-inch screens are a favorite for rear-seat entertainment. They strike a good balance between being easy to see and fitting comfortably in most setups.
Do I need a power inverter for console gaming?
If your vehicle already includes a built-in video input or a power supply that works with your gaming console, you probably don’t need a power inverter. But if your car doesn’t provide AC power, you’ll need one. A power inverter converts your car’s 12V DC battery power into AC power, which is necessary to run most gaming systems.
Is portable or fixed installation better for my car?
Both choices come with their own set of perks, depending on what you’re looking for. Fixed systems, like overhead monitors, provide a polished, permanent setup with larger screens and a clean, built-in look – perfect for those planning to use them long-term. On the other hand, portable systems, such as tablets, are more affordable, simple to set up, and highly adaptable, making them an excellent pick for renters or those who want to switch between vehicles. Go for fixed if you’re after durability and style, or choose portable for ease and versatility.
To schedule an appointment with your friendly neighborhood experts at Car Repair Services, give us a call at +1 718-470-2223 or fill out the form below with your information and requested services. One of our team members will get back to you as soon as possible to confirm your appointment.
mailing list to receive updates on new arrivals, offers and other discount information.
We use cookies to ensure that we give you the best experience on our website. If you continue to use this site we will assume that you are happy with it.Ok